How to fill Passport Form
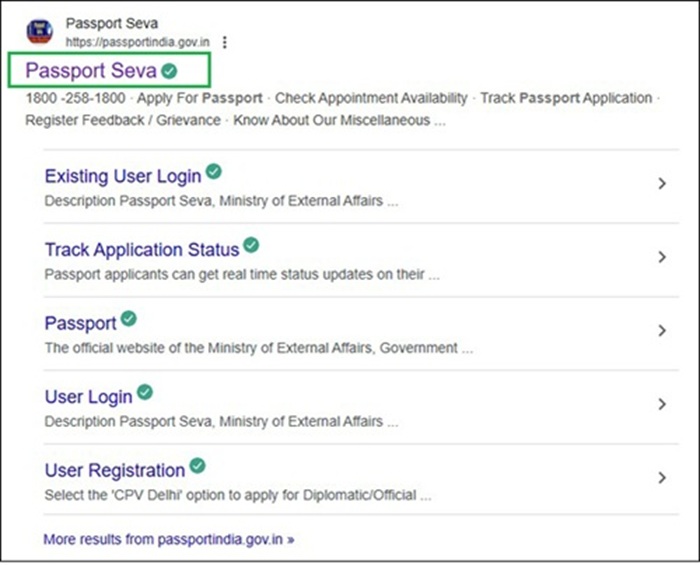
Step-01 - Visit the official Portal
First, visit the Passport Seva Website, i.e. www.passportindia.gov.in
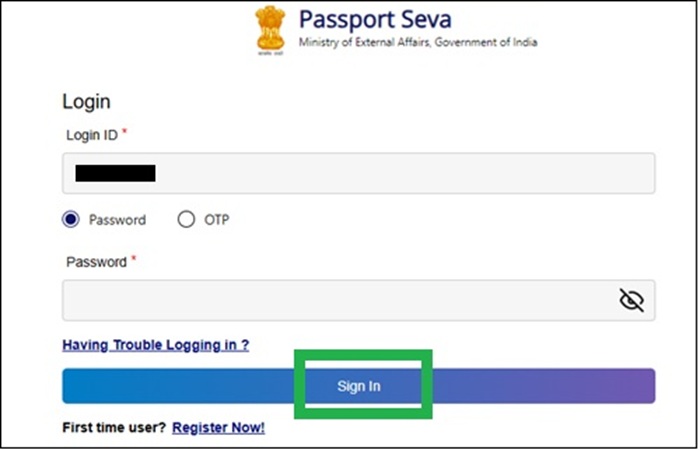
Step-02 - Enter Login Details
Click on the Login Tab and sign in using your User ID and password.
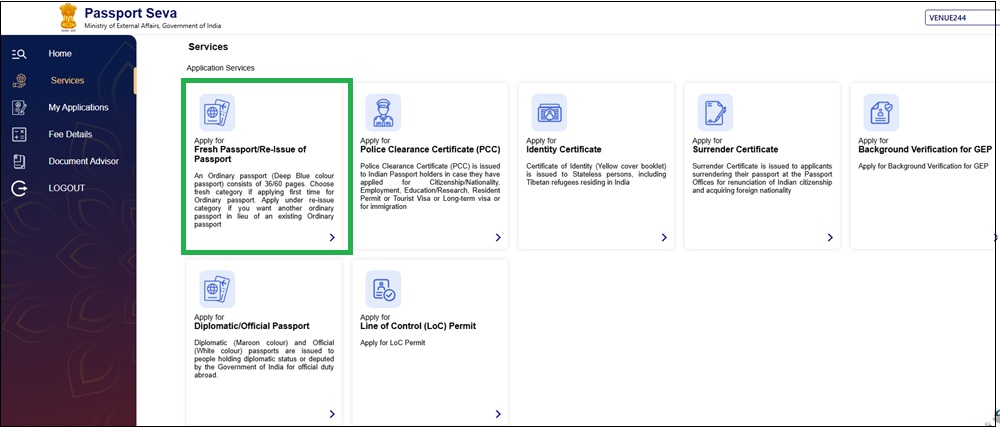
Step-03 - Choose the Services
After logging in, a new page will appear, as shown in the image below. Here, you can choose Fresh Passport/Re-issue of Passport Services.
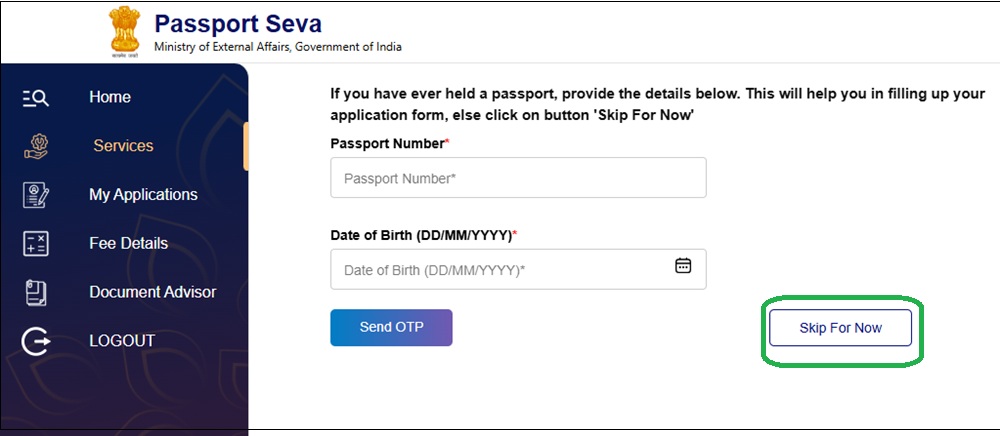
Step-04- Old Passport Details
If you have previously held a passport, please provide its number; otherwise, press the 'Skip for now' tab.
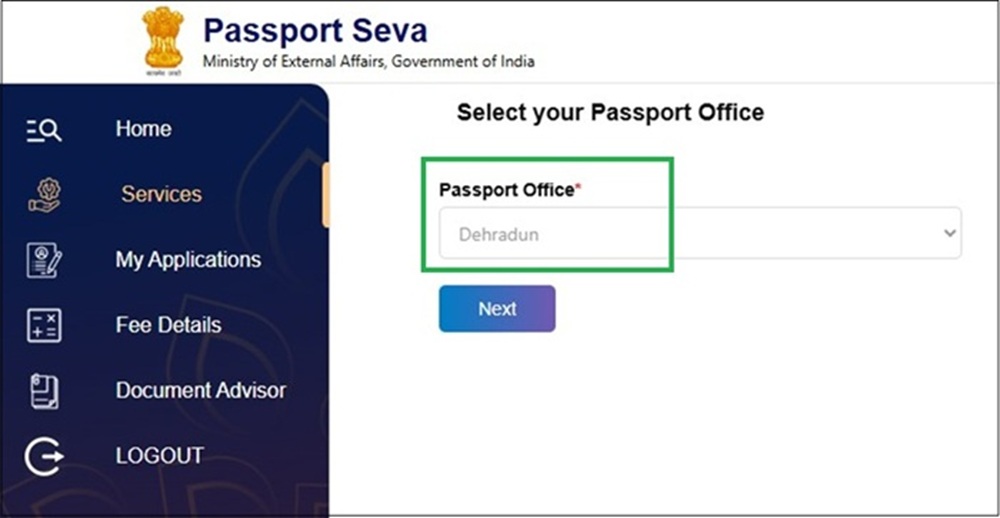
Step-05 - Select Passport Office
From the drop-down menu, choose the passport office from which you are applying.
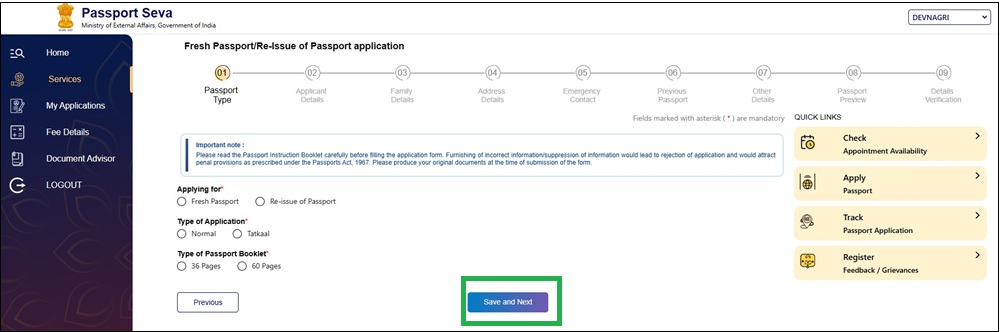
Step-06 - Select the Required Option
- If applying for the passport first time, select 'Fresh Passport'.
- If applying for a re-issue or renewal, select Re-issue of Passport.
- Choose the application type from Tatkal or Normal.
- Select the number of pages for your passport.
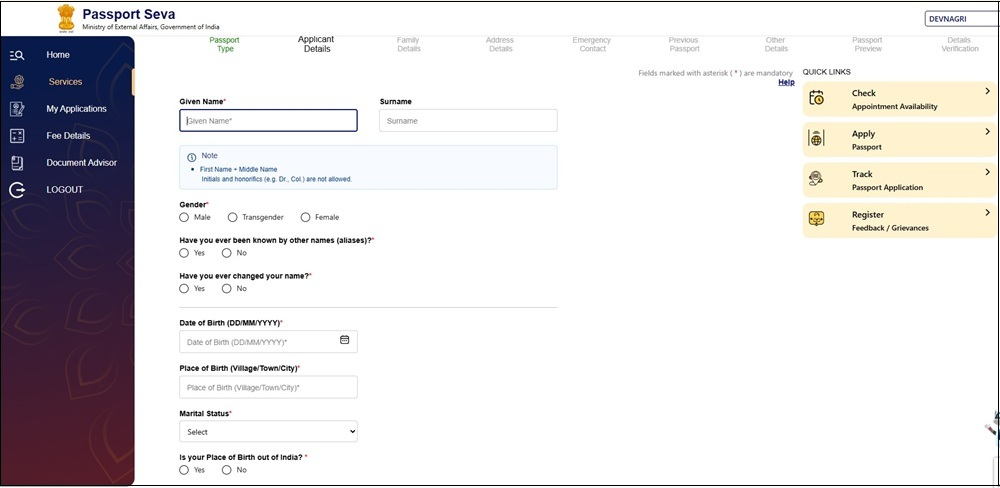
Step-07- Provide Details
Enter the requested details in the given fields.
Step-08- Save the Details
Save your entries at each step by pressing the 'Save and Next' tab.

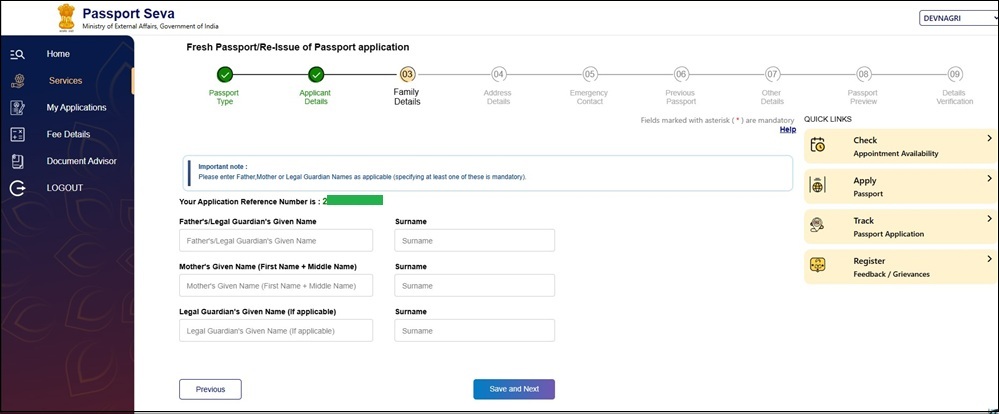
Step 9-Share Family details
Enter the details of your family members (mother, father or legal guardian's name).
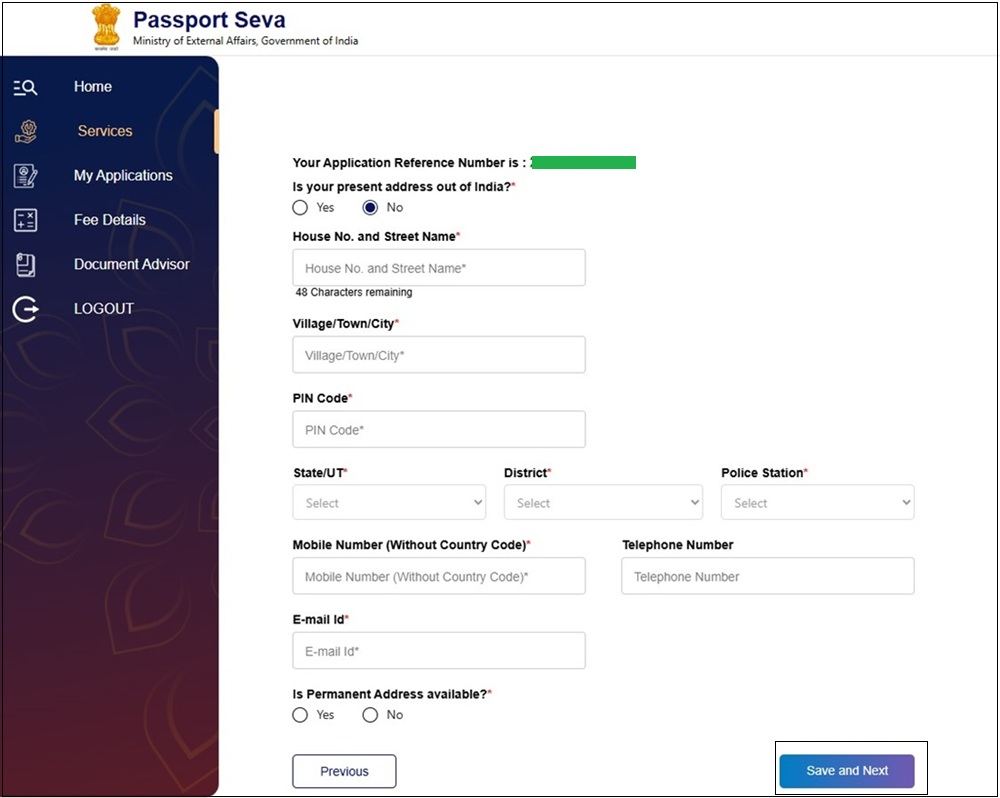
Step-10- Fill in Address Details
Enter your address and other details, as mentioned in your identity proof.
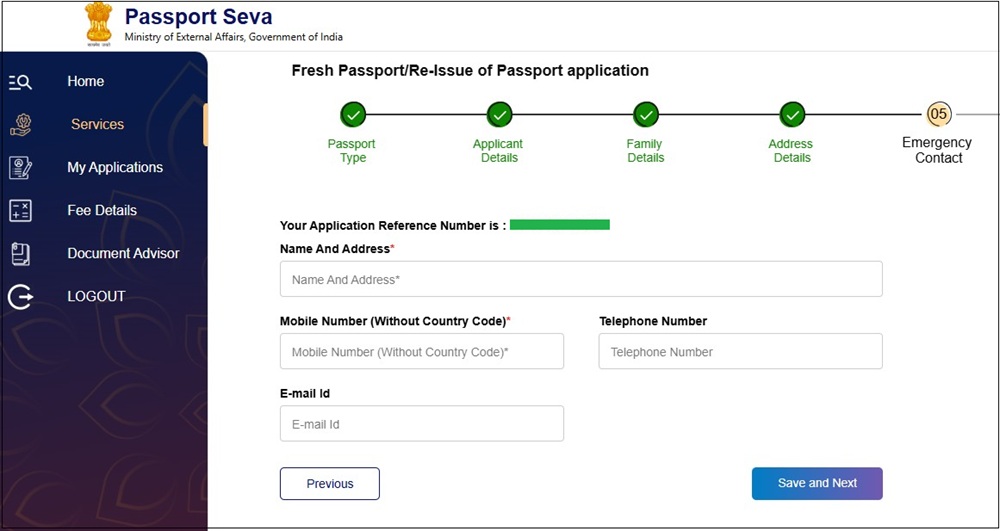
Step-11- Fill in Emergency Contact
Provide the Emergency contact of one person who is close to you and can be reached in an emergency.
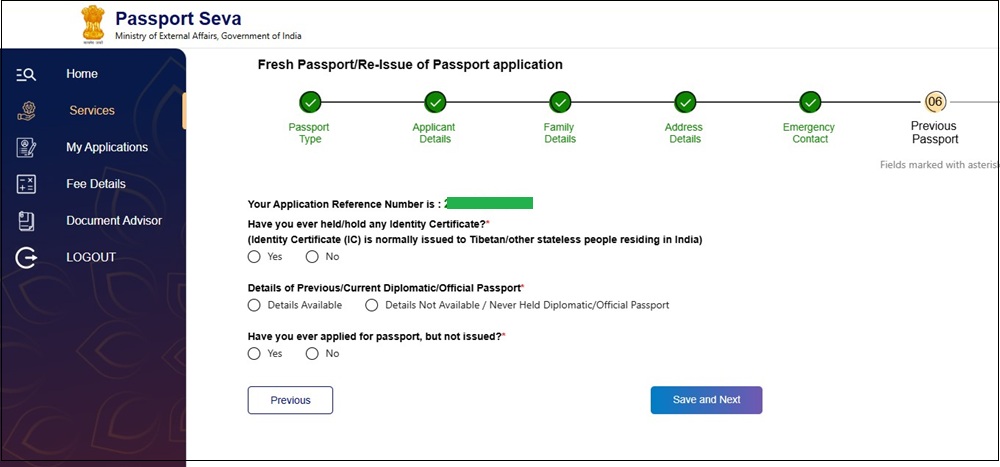
Step 12 -Previous Application or Identity Certificate (if any)
- If you have been issued an Identity Certificate by the Indian Government (generally for Tibetans and other stateless people residing in India), share its details.
- If you have applied for a passport but it was not issued for any reason, mention its file number.
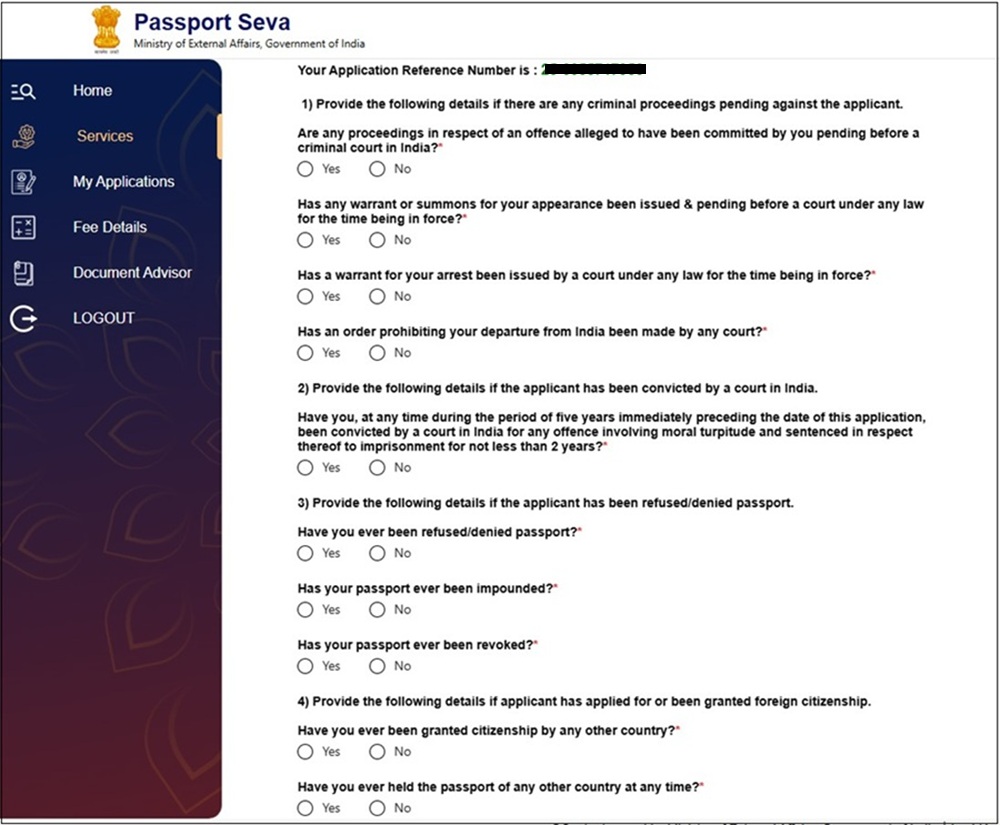
Step 13 - Legal Cases/Foreign Citizenship
- Read this section carefully, as you have to declare whether you:
- Have any pending legal cases.
- Have been convicted by any court.
- Have an arrest warrant against you.
- Have applied for or obtained foreign citizenship details.
- Have returned to India using an Emergency Certificate.
- Some others.
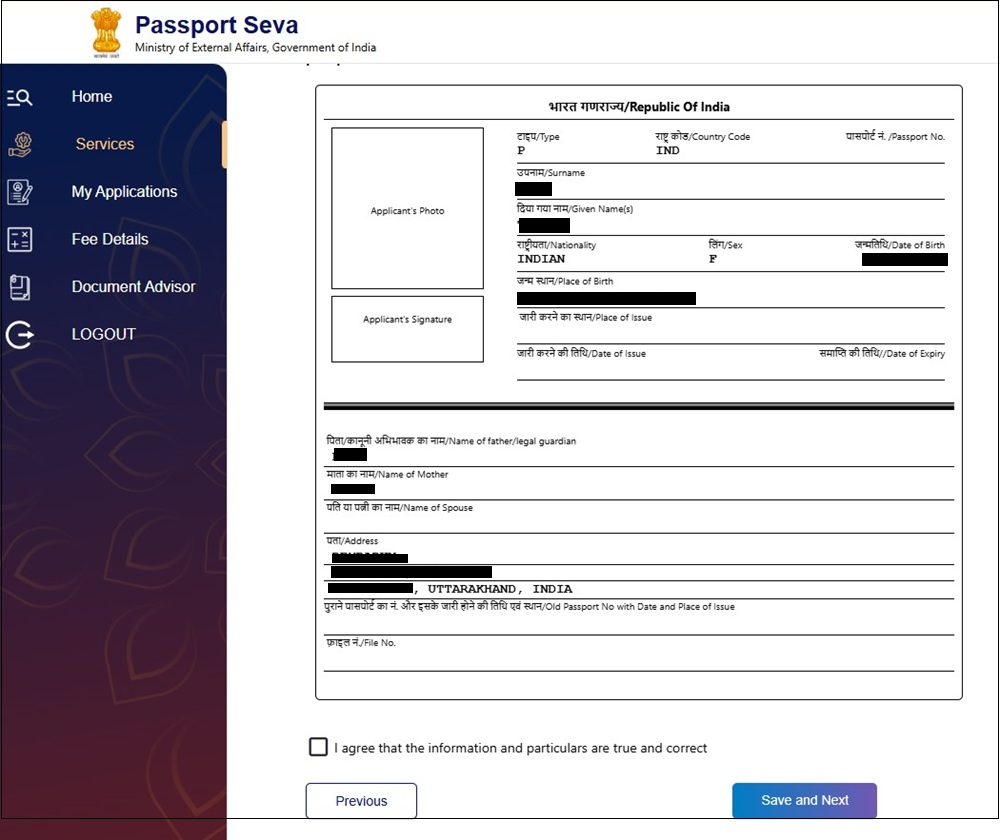
Step 14 - Passport Preview
Here, you can preview how your passport details will appear.
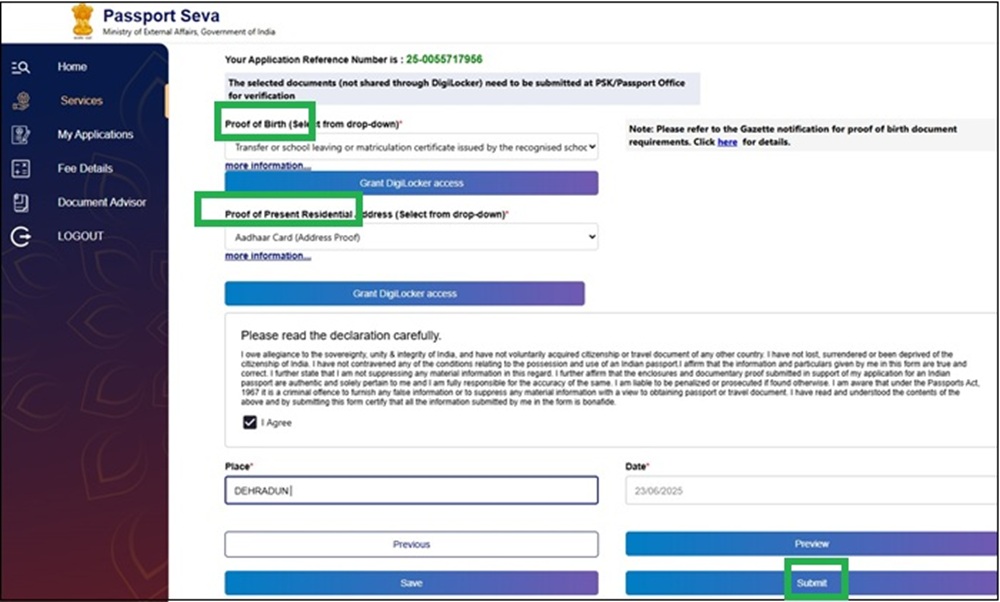
Step 15- Choose Document
Select address proof and birth proof documents from the drop-down menu that you will present on your appointment day. Before its final submission, you can also preview the submitted details.
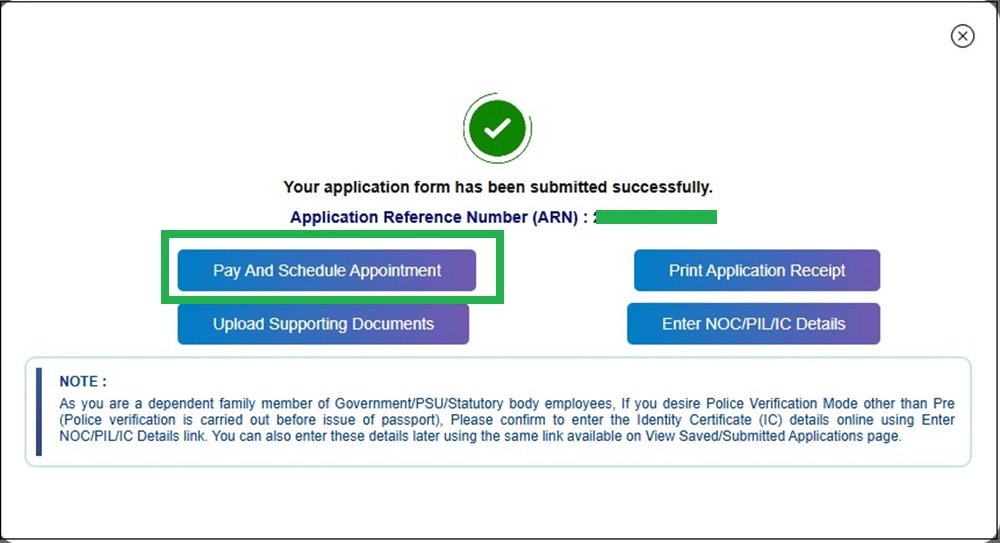
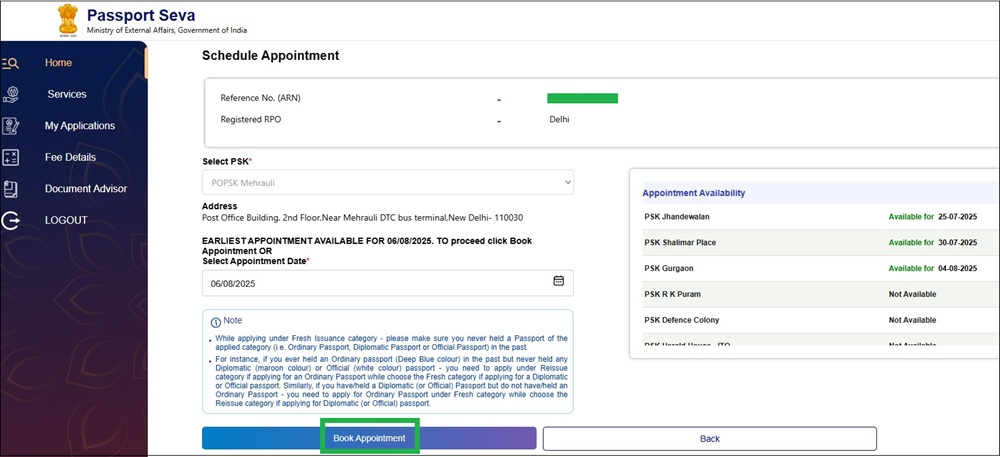
Step 16- Schedule an Appointment
Click the 'Pay and Schedule Appointment' to proceed.
Step 17 - Select Passport Seva Kendra
From the drop-down list, select the Passport Seva Kendra (PSK) where you want to book your appointment. Appointment availability for the selected PSK will be displayed in the same window.
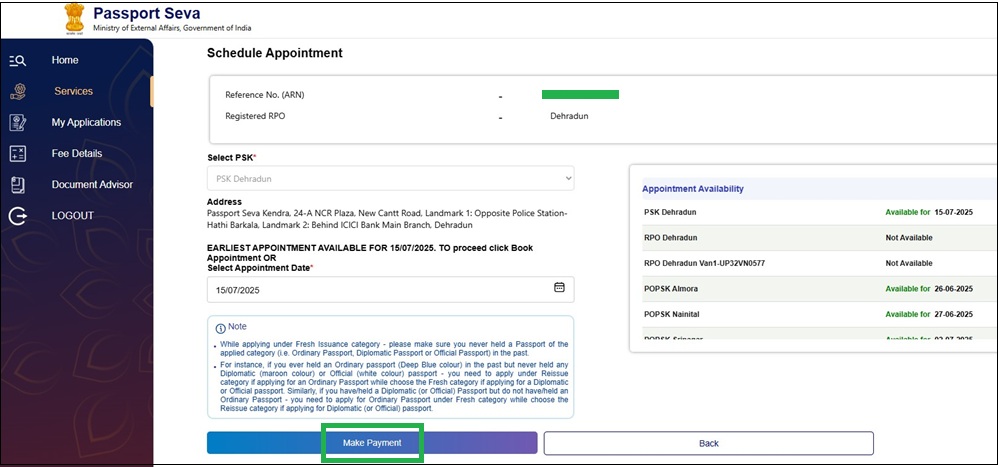
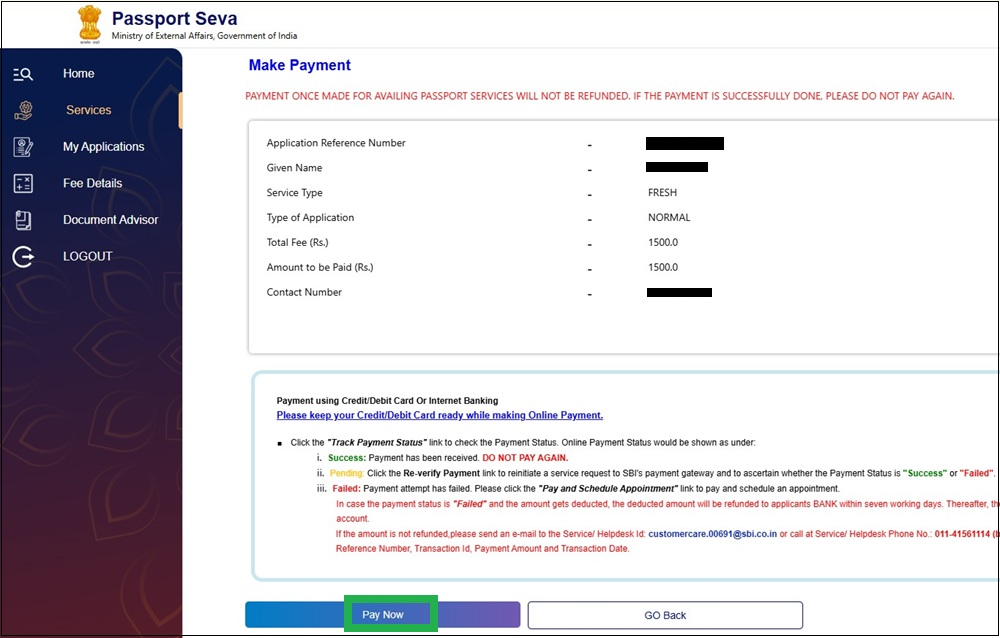
Step 18 - Verify Details
Before making payment, verify all details and press the 'Pay Now' tab.
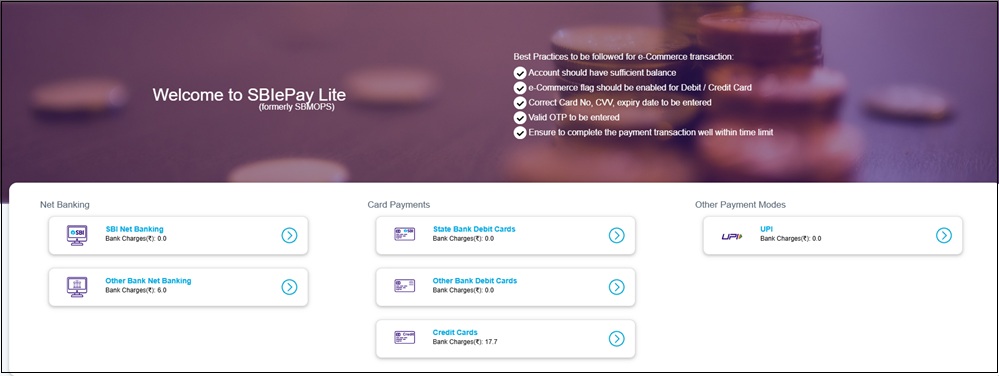
Step 19 - Select the Mode of Payment
Choose your preferred payment mode from the available options.
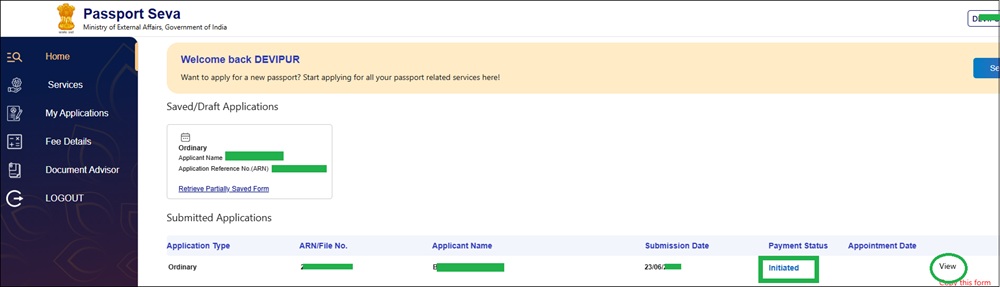
Step 20 -Check Payment Status
If the fee is deducted but the status shows as initiated or pending, check its status under the Track Payment section. In case of any payment failure, the deducted amount will be refunded to your account within 5-7 days.
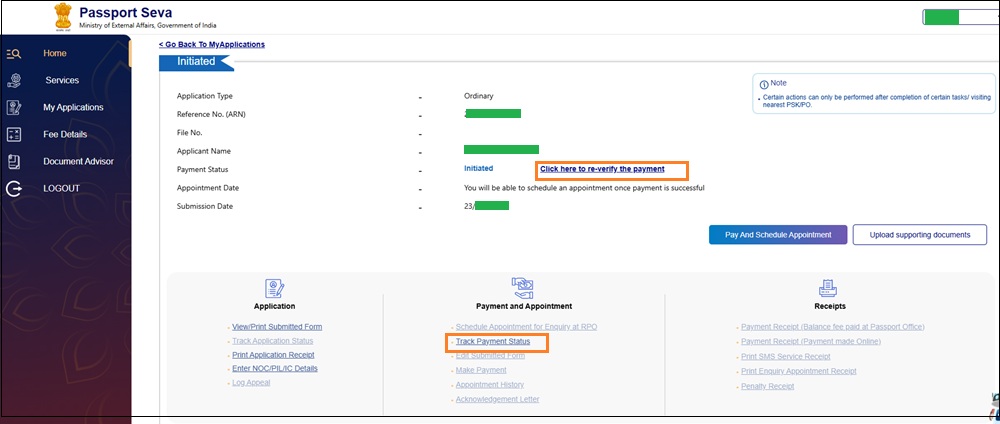
Step 21- Re-verify the payment
If the payment status appears Initiated, click the Re-verify payment to check its status.
Step 22- Payment Successful
Upon successful payment, your payment status will show as success (as shown in the image).

Step 23- Schedule appointment
Once payment is successful, book your appointment from the available dates.
Step 24-Application Status
From here, you can check your application status, view or print the submitted application, and download the payment receipt.

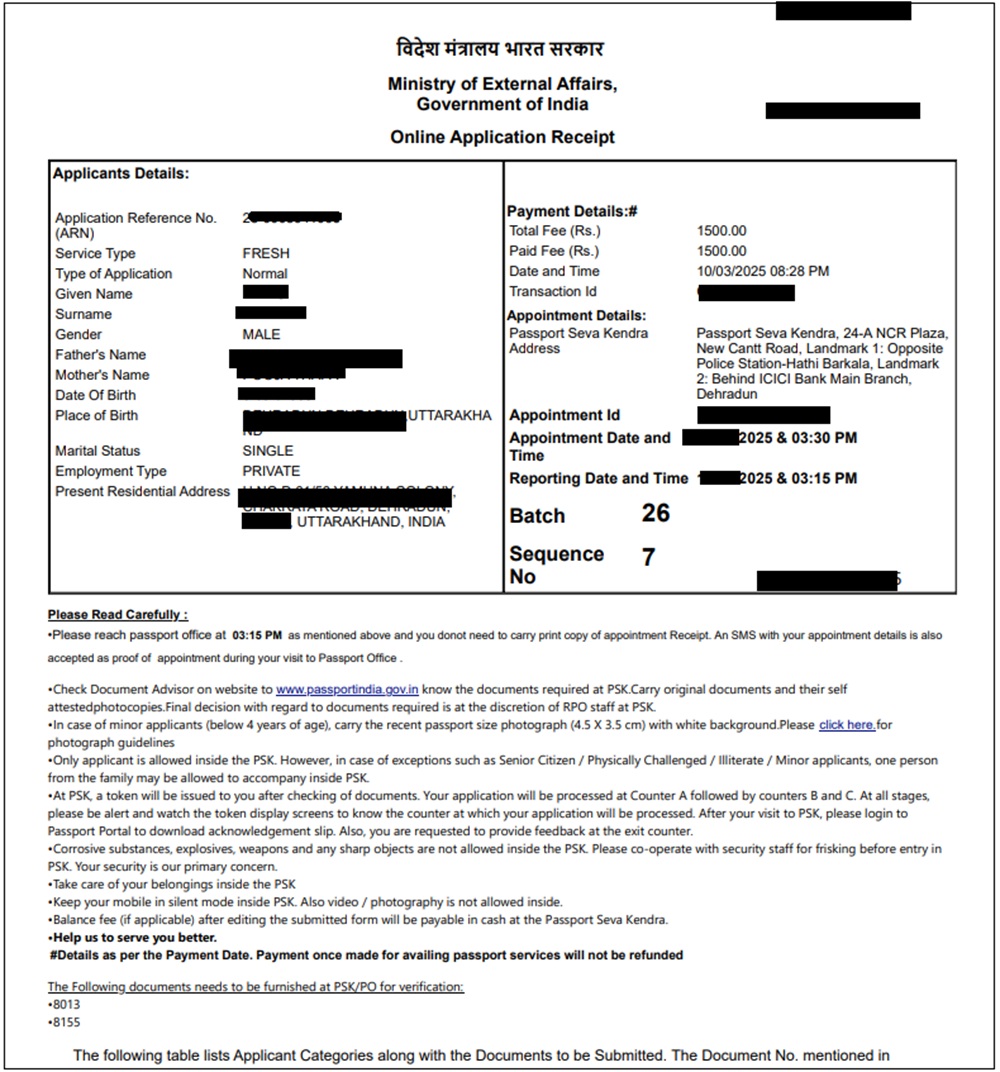
Step 25 -Print the Appointment letter
On the appointment day, carry your appointment letter along with other requisite documents to the Passport Seva Kendra.

Add new comment